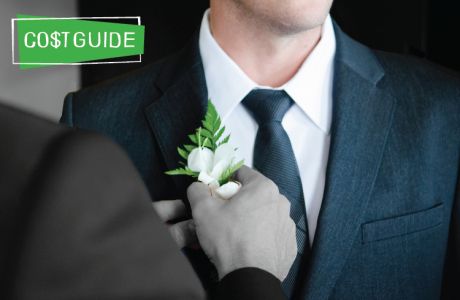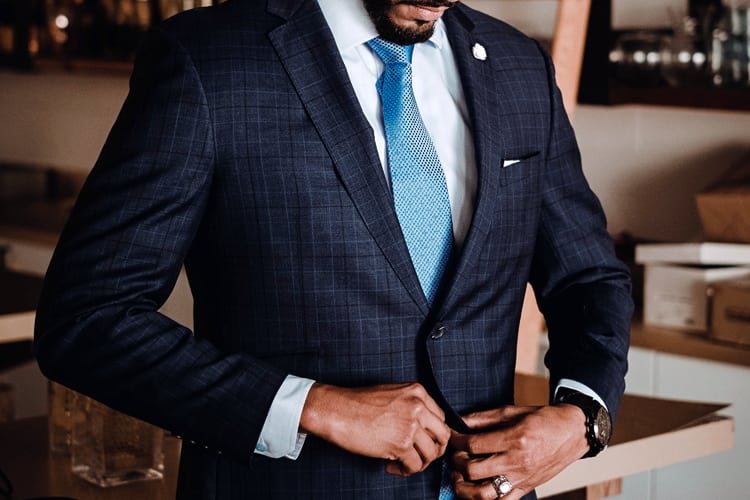

You’ve got the perfectly tailored tux. Your shoes are on point, you have your grandfather’s heirloom cufflinks, and you picked out a pocket square that gives you that little flash of style you were hoping for.
But you’ve got no clue how to fold a pocket square for your tuxedo. At all.
Not knowing how to fold a pocket square like James Bond is fine. It’s not your fault, nobody is going to judge you for not wearing one at a job interview or a party. But men’s style is all in the details: the cut of your jacket, the material of your tie, and yes, the bit of fabric poking out of your jacket pocket. If you master the art of the pocket square for your wedding day, you’ll open up a whole world of new options when dressing to impress. You want to be the man who can properly rock a pocket square. Trust us.
Practical Uses For Pocket Squares
Why do you even need a pocket square, right? If you’re not used to wearing one, it feels a bit extra, we get it. But it can do a whole lot for you that your other accessories won’t.
A pocket square is the perfect amount of material to add some color or pattern to a look. Wear too flashy of a tie and you look like a used car salesman. But an expertly folded, eye-catching pocket square adds dimension to your look without sacrificing class.
It completes the suit. Nothing immediately indicates the amount of thought and attention to detail you’ve put into your appearance like a pocket square. If you want people to look closely enough to appreciate the tailoring you splurged on, the right pocket square tells them that you know what you’re doing.
Unlike women, men just don’t have as many color options in formal wear. The pocket square is the perfect opportunity to coordinate the bride’s carefully selected wedding colors in the men’s outfits, or to add a complementary color to your tie in an important business meeting.
The pocket square is an easy addition of style to take an outfit up a notch. Have no clue what “smart casual” is? Add a pocket square to your go-to blazer and jeans.
How To Fold A Pocket Square For A Tuxedo
The cardinal rule when it comes to tuxedos is to always keep it simple and classic. For the same reason why you avoid the power blue monstrosity you wore to junior prom, you do not want some over-the-top pattern or crazily intricate fold for your pocket square. You never wear a pocket square with a tuxedo to show off. You wear it because the tuxedo is incomplete without it.
So your tuxedo pocket square should be plain and white. You cannot go wrong in any situation with a white pocket square, but a tuxedo practically demands it. As the groom, just keep it white or white with a colored trim. The groomsmen can match their pocket squares to the bridesmaids’ dresses, but only solid colors and no fancy folds
The Square or Classic Fold
The gold standard, as easy as a schoolboy knot and as dignified as a full Windsor. Great for showing off the colored border of the square.
- Start with the pocket square face down in a square shape.
- Fold the square in half, from right to left.
- Fold in half again, from bottom to top.
- Fold in half again, from left to right.
- Fold the bottom up behind the front of the pocket square just high enough to fit into your pocket.
- You can place the square in your pocket either fold side down for a more layered look, or fold side up for a more streamlined version. Aim for it to stick up a quarter of an inch out of the pocket.
The Presidential Fold
A variant on the Square Fold that is a bit cleaner and more distinguished, but just as easy to fold.
- Start with the pocket square face down in a square shape.
- Fold the square in half, from right to left.
- Fold again from left to right but not all the way, leaving a little room on the right margin.
- Fold in half, from top to bottom.
- Fold the bottom up behind the front of the pocket square just high enough to fit into your pocket.
- Place the square in your pocket fold side down, sticking out a quarter of an inch from the pocket.
The One Point Fold
If you’re feeling adventurous, the wildest you can go in a tuxedo is the One Point. A useful and classic fold if you want to add a more angular flair.
- Start with the pocket square face down in a diamond shape.
- Fold in half, bringing the left corner up to the top corner and the bottom corner to the right corner.
- Fold in half again, bringing the right corner up to the top corner and the bottom corner to the left corner, creating a smaller diamond.
- Fold the right side to the left, keeping a straight upper border in the fold.
- Fold the left side over the right, keeping that straight upper fold.
- Fold the bottom up behind the front of the pocket square just high enough to fit into your pocket. Place and adjust the square in your pocket so only the upper triangle is poking out.
How To Fold A Silk Pocket Square
Simpler is also better with silk pocket squares, since they are more delicate and will hold the folds less easily. All of the folds recommended for tuxedos work great with a silk pocket square. But if you have a beautifully patterned silk square you can’t wear with your tux, use one of these folds with a suit when you want a splash of color.
The Poof
The Poof is easy, fun, and requires almost no actual folding. The perfect choice for when you just want to toss a pocket square in and not think much about it.
- Start with the pocket square face up in a square shape.
- With your thumb and forefinger, grab the square from the center and lift it into the air.
- Create a ring with your other thumb and forefinger and slowly push the square through the ring until you reach the loose ends at the bottom.
- Fold the bottom up behind the front of the square just high enough to fit into your pocket. Place the square in your pocket and adjust the “poof” as you like.
The Reverse Poof
A variant, for a more floral look.
- Start with the pocket square face up in a square shape.
- With your thumb and forefinger, grab the square from the center and lift it into the air.
- Create a ring with your other thumb and forefinger and slowly push the square through the ring until you reach the loose ends at the bottom.
- Pinch the center to keep everything in place and flip everything upside down, so the loose ends are now on top.
- Fold the bottom up behind the front of the square just high enough to fit into your pocket. Place the square into your pocket and adjust the “petals” so they are spaced out and fill the width of your pocket.
The Winged One Point
A more nuanced variant of the One Point is the Winged One Point, which adds more dimension to the square.
- Start with the pocket square face down in a diamond shape.
- Fold the diamond in half, from top to bottom.
- Fold the right side down, so that the right corner meets the bottom corner.
- Fold the left side down, so that the left corner meets the bottom corner.
- Fold the right side to the left, keeping a straight upper border in the fold.
- Fold the left side over the right, keeping that straight upper fold.
- Fold the bottom up behind the front of the pocket square just high enough to fit into your pocket. Place and adjust the square in your pocket so only the upper triangle is poking out.
The Two Point
A slightly more intricate fold that you should still be able to do with a silk square.
- Start with the pocket square face down in a diamond shape.
- Fold in the diamond in half, from bottom to top, but make the fold slightly askew, creating the two points.
- Fold the right side to the left, keeping a straight border at the bottom.
- Fold the left side to the right, keeping that straight bottom border.
- Fold any of the remaining left corner behind the front of the square.
- Fold the bottom up behind the front of the pocket square just high enough to fit into your pocket. Place the square in your pocket and adjust to keep the two points separate.
The Scallop
For a more curvaceous and casual fold that pairs nicely with the delicacy of silk.
- Start with the pocket square face down in a square shape.
- Fold the lower left corner up to meet the upper right corner.
- Fold the lower right corner up to meet the upper left corner.
- You should now have an upside down triangle. Fold the upper right corner down to meet the midpoint of the left side, keeping a straight bottom border in the fold.
- Fold the upper left corner down to the right, along the same straight bottom border as the previous fold.
- Fold the bottom up behind the front of the pocket square just high enough to fit into your pocket. Adjust as needed so the “bloom” fills your pocket.
How To Fold A Three Point (And Four Point) Pocket Square
So you have the basics down, nailing that Presidential Fold with a white silk square in your tuxedo. But what about a cooler fold you can stick in your suit jacket for your bachelor party at a Vegas casino or something more stylish to slip into your navy blazer while out for dinner on the honeymoon? With a bit of practice, you can master these folds and up your game whenever you want.
The Three Point
Clean and symmetrical, and while it isn’t the right choice for a tux, is a great staple for more formal occasions. Bust it out at the Michelin star restaurant you book for Valentine’s Day or your first anniversary.
- Start with the pocket square face down in a diamond shape.
- Fold the diamond in half, from top to bottom.
- Fold the right corner up to the left side of the center point.
- Fold the left corner up to the right side of the center point, carefully adjusting the fold to be symmetrical with the left side.
- Fold the right side to the left, keeping a straight upper border in the fold.
- Fold the left side over the right, keeping that straight upper fold.
- Fold the bottom up behind the front of the pocket square just high enough to fit into your pocket. You can choose which side is the front in this fold – flip it over for a more sophisticated look with the central point in front of the sides, or keep the sides in front for a more playful look. Place the square in your pocket and adjust as needed.
The Four Point (aka The Crown aka The Cagney Square)
You can combine the techniques behind the Two Point and the Three Point to pull off the Four Point, also known as The Crown or The Cagney Square. It is flashy and hard to get as symmetrical as the Three Point, but is a fantastic way to turn even the simplest pocket square into a statement piece.
- Start with the pocket square face down in a diamond shape.
- Fold in the diamond in half, from bottom to top, but make the fold slightly askew, creating two points.
- Fold the right corner up to the left side of the center two points.
- Fold the left corner up to the right side of the center points, carefully adjusting the fold to be symmetrical with the left side.
- Fold the right side to the left, keeping a straight upper border in the fold.
- Fold the left side over the right, keeping that straight upper fold.
- Fold the bottom up behind the front of the pocket square just high enough to fit into your pocket. You can choose which side is the front in this fold – flip it over for a more sophisticated look with the central point in front of the sides, or keep the sides in front for a more playful look. Place the square in your pocket and adjust as needed.
The Stairs
is a more complicated and impressive fold that still gets you three distinct points, creating a cascade of overlapping folds. A difficult fold to master, but extremely clean and dignified when executed properly.
- Start with the pocket square face down in a square shape.
- Fold the upper right corner down to meet the lower left corner.
- This diagonal fold will be your first stair. Create the second stair by taking just the fabric on top of the fold and bringing it in to create a smaller, parallel fold to the diagonal fold. This is your second stair.
- Create a third stair by doing the same with the remaining top fabric, keeping the fold parallel to the previous two folds.
- Pinch the center of the stairs in place as you fold the upper left corner of the square behind the stairs to meet the bottom right corner.
- You should now have a triangle in front of you, with the three stairs folded at the top. Take the right side of triangle and fold it back behind the pocket square.
- Take the left side of the triangle and fold it behind the pocket square as well.
- Fold the bottom up behind the front of the pocket square just high enough to fit into your pocket. Adjust the pocket square to make sure each stair remains separate and parallel.
Angled Points
As an alternative to the Two, Three, or Four Point folds, you can accomplish the same amount of points with Angled Points, trading the crispness of the traditional point folds for a more kinetic, casual look. You can follow the full instructions below for Four Angled Points, or stop early for Three or Two.
- Start with the pocket square face down in a square shape.
- Fold the upper left corner down to meet the lower right corner.
- Bring the lower left corner up next to the upper right corner, creating the first two points.
- Bring the lower right corner up next to the first two points, creating the third point.
- Separate the fabric in the third point to create a fourth point
- Fold the remaining left side of the square behind to the right.
- Fold the bottom up behind the front of the pocket square just high enough to fit into your pocket. Adjust the pocket square to keep the angled points separate.
How To Fold A Casual Look Pocket Square
If you’ve been practicing and can fold a Square in your sleep and do however many points you feel like, it makes sense that you want to show off these skills outside of just special occasions. But you don’t want to be the dude overdressed at the backyard barbeque. So how do you strike the right balance of the casual pocket square?
Here are some basic rules.
- KEEP IT FUN – Invest in some cool, colorful patterns that just add a bit of color to an outfit. Polka dots, checkerboard, plaid, paisley, whatever stands out and fits your personality.
- KEEP IT LIGHT AND LOOSE – Lighter colors are better than darker colors, which can feel more serious. Show off your looser folds (Puff, Reverse Puff, Scallop) or make your Square or Two Points a bit less crisp than normal.
- KEEP IT BALANCED – Just by ditching the tie the pocket square will already feel more casual. But if you go for the pocket square, let that be your main accessory. Keep everything else simple – sunglasses, watch, belt, shoes, etc. The difference between being stylish and gaudy is always knowing when enough is enough.
There are tons of options when it comes to pocket squares. Learn what works best for you and not only will you have the perfect tuxedo look, but you can add a new element to your overall style.